These are instructions for preparing and sending DocuSign documents. It is recommended that you reach out to the users who will be completing the documents and make them aware of the documents being assigned to them.
How to setup and send a Template document using DocuSign
Login to https://esignature.gatech.edu/cfeis/docusign/
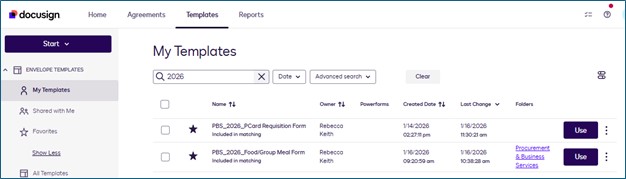
- Navigate to the Templates tab.
- Select the template collection to send from:
- All Templates - contains all templates to which you have access.
- Locate the PBS template you want to use by searching:
- PBS_2026
- To use the template to start a new document, click USE.
- A new envelope opens with your template settings loaded.
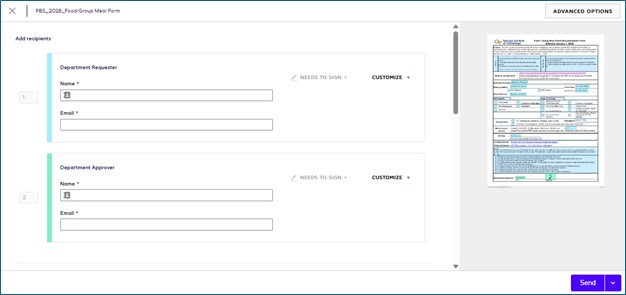
- For any recipient roles, Search for each person using their GT Username, e.g. gburdell3 or gburdell3@gatech.edu.

Adding Recipients

- Once the person’s name/email address is selected the fields will be populated.
- Email address format: GTusername@gatech.edu
- You can use the template message as is, or modify it.
TIP: If you send the same envelope over and over, enter a custom subject line. The current message contains the recipient’s name and document name.
- To review the recipient fields, click NEXT.
- To send your envelope click SEND.
Routing a document using DocuSign
After document is selected you will need to enter one or more email addresses in this format, gt-username@gatech.edu. Each person’s name will populate automatically. If the name does not populate, the email address is entered incorrectly.
It is best to enter the email address or username to make sure the correct identity is selected.
The Dept Requesting person in the 1st position will be notified first to complete their portion of the document. Once Person1 has completed all required fields and clicks the Finish button, the document will be sent to the 2nd Approving person to Finish the last fields indicating the request is approved.
The document will then be accessible to download and attach to the Workday Requisition or Expense Report as needed.
If you have questions, submit a ServiceNow Request to Accounts Payable.
Additional Instructions are available from DocuSign.
Tracking a Document
As the sender, you should have full access to view the status of the document’s flow.
The message received by the Document Requester appears like this:
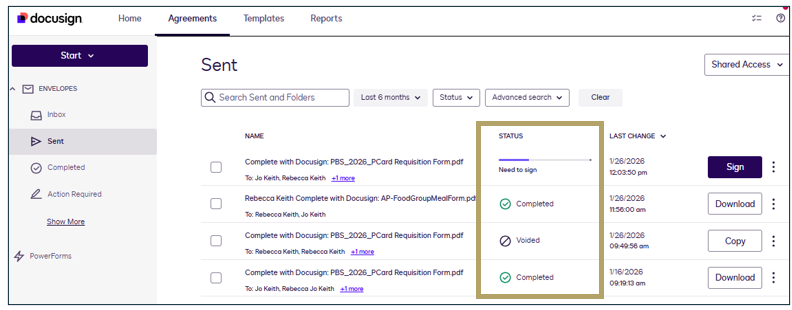
To view the status of each document
- Click Home or Agreements tab at the top.
- Agreement Activity is visible on either tab.
- Any documents sent by you will display. Active documents with show a purple status line until it has been completed by each person.
To add a document as an attachment in ServiceNow
Download a copy of the final version of the completely signed document.
- Select the Agreements Tab in DocuSign.

- Click Download on the right-side of that documents line.
The document will download to your computer’s Downloads folder, unless you have changed that location.
- Complete your ServiceNow ticket and select to upload a file at the bottom the ticket.
- Browse for that Downloaded file and select to upload.